If you’ve spent any time in the surface mount technology (SMT) PCB assembly space, you know that the conveyor system is more than just a way to move boards from one machine to the next. It’s the backbone of every line—one misaligned belt, a speed miscalculation, or a tiny mechanical hitch, and your whole production flow grinds to a halt. As an SMT assembly supplier, I’ve seen this play out firsthand: last year, a client came to us with a line that was losing 12 hours of production a week just because their conveyors were jamming, their placement speeds were inconsistent, and they were wasting thousands on unnecessary downtime. Fixing that system didn’t just cut their costs—it let them take on 20% more orders in the same month. If you’re struggling with similar bottlenecks, here’s how we optimized our own conveyor systems (and our clients’) to boost efficiency, cut waste, and keep lines running smooth. SMT PCB Assembly
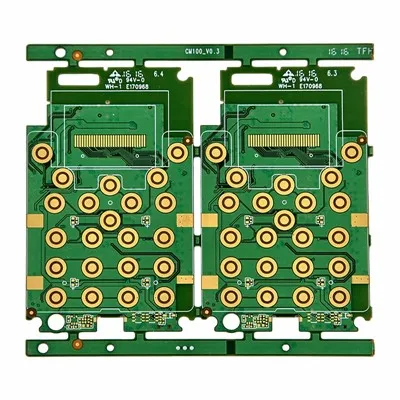
First, stop treating conveyor systems like one-size-fits-all hardware. A mistake I see all the time is assuming that a standard conveyor will work for every board. But SMT PCBs come in all shapes and sizes—from tiny 0201 component boards for wearables to large, heavy boards for industrial controllers. Generic conveyors often have adjustable guides that are too clunky, or belt widths that don’t have enough grip to hold small boards, leading to them shifting mid-placement. For example, when we started assembling boards for a medical device client with 2cm-wide flexible PCBs, our old standard guides would squeeze the edges too tight, causing the board to warp slightly before it hit the solder paste printer. We swapped to precision, servo-driven guide rails instead of manual ones. These rails adjust in 0.1mm increments, so they cradle each board exactly along its non-critical edges, no pressure on the circuitry. Within two weeks, that client’s placement error rate dropped by 11%, and we eliminated 90% of the misalignment errors they were seeing. The key here is matching conveyor specs to your board’s unique dimensions: for thin, flexible boards, use anti-static, low-tension belts that flex with the board instead of pulling it taut; for heavy multi-layer boards, go with reinforced metal frames and curved belt edges that distribute weight evenly. Skip the generic off-the-shelf units—work with a supplier that can customize conveyor setups for your specific PCB profile, and test the setup with a sample batch before rolling it out.
Next, tune speed and acceleration to eliminate mid-process shocks. Most production lines set conveyor speed based on the fastest machine in the line, which is usually the pick-and-place unit. But pushing conveyors to match pick-and-place speed causes unnecessary acceleration and deceleration—when a board lurches onto the pick-and-place, the components can shift, or the board can slide out of alignment. We tested this on our main line last quarter: initially, we set conveyors to move at 1.2 meters per minute to sync with our high-speed pick-and-place. We found that boards were hitting the pick-and-place machine’s entrance 15% off-center, leading to rework. We adjusted conveyor speed to match the cycle time of each individual machine instead of the line as a whole. For the solder paste printer, we set conveyors to move at 0.8 meters per minute to give the printer’s camera enough time to inspect stencil alignment. For the pick-and-place, we upped it to 1.1 meters per minute, and then slowed to 0.9 meters per minute before the reflow oven, to eliminate any heat-related board warping from sudden movement. We also added soft-start and soft-stop functions to all conveyors—instead of the belt jerking to a stop at the oven entrance, it decelerates gradually over 2cm. The result? Our line’s rework rate from conveyor-related issues dropped by 22%, and we reduced conveyor wear by 18% because the belts weren’t absorbing the shock of sudden speed changes. A quick tip here: use your line’s MES (manufacturing execution system) to sync these adjustments automatically. When you switch to a new PCB model, the MES should pull the correct speed and acceleration settings from a preloaded profile, so operators don’t have to manually tweak things each time. It’s a small step, but it cuts down on human error and keeps your line consistent.
Then, keep the conveyor track clean and calibrated to avoid hidden downtime. This is a task that many teams treat as an afterthought, but dirty conveyors are one of the top causes of unplanned downtime. Flux residue, solder paste spills, and dust from component packaging build up on conveyor belts and track surfaces over time. A tiny piece of dried flux on a guide rail can catch a board’s edge, leading to a jam that stops the entire line—we once had a 3-hour shutdown because a single fleck of solder paste got stuck between two conveyor rollers. To fix this, we implemented a weekly deep-cleaning schedule that’s tied to our MES. Every Sunday, when the line is idle, operators remove the conveyor belts and soak them in a flux-safe cleaning solution; they also wipe down all guide rails, rollers, and the entrance to the reflow oven with isopropyl alcohol, and lubricate any moving parts with a non-conductive grease. But cleaning isn’t enough—calibration is just as important. We calibrate our conveyor guide alignment and height every 10 production runs, using a precision calibration tool that checks against industry standards. We also added a visual inspection checkpoint at the end of each line: a technician walks the line every hour, checking for debris on belts, loose guide screws, or bent rollers. This small step caught a problem last month where a guide rail had shifted just 0.5mm—had we not caught it, it would have caused a board jam that would have taken 45 minutes to fix, costing us $1,200 in lost production. For teams with limited time, even a daily quick check—wiping down the belt surface with a lint-free cloth and checking guide tightness—can make a huge difference. Don’t wait for a jam to happen; build cleaning and calibration into your regular maintenance schedule, and assign a specific team member to own this task.
Another big optimization is integrating smart sensors to track conveyor performance in real time. A few years ago, we didn’t have any sensors on our conveyors—we only found out about a problem when the line stopped. Now, we’ve installed a network of small, low-cost sensors on each conveyor: proximity sensors that detect if a board is misaligned, vibration sensors that alert us to worn rollers or belts, and temperature sensors that monitor belt tension to make sure it’s not too tight or too loose. For example, the vibration sensors on our reflow oven entrance conveyor caught a worn roller two days before it would have failed completely. The sensor sent an alert to our maintenance team’s phones, so they swapped the roller during a scheduled break, avoiding an unplanned shutdown. The proximity sensors also work well for small, fragile boards: if a board is even 1mm off-center, the sensor triggers a gentle speed reduction, giving the machine’s camera time to adjust alignment before the pick-and-place step. We’ve also used the data from these sensors to optimize our maintenance schedule. Instead of replacing conveyor belts every 6 months (which is what the manufacturer recommended), we track the number of hours each belt is in use, and replace them only when the vibration data shows they’re reaching the end of their lifespan. That cut our conveyor replacement costs by 28% last year. The key here is to start small—don’t go out and install a full sensor network overnight. Add one type of sensor at a time, test it, and adjust as needed. Even a single proximity sensor on high-volume lines can catch hundreds of alignment errors before they turn into jams.
Finally, train your team to recognize small conveyor issues before they become big ones. No matter how many sensors you install or how optimized your setup is, your operators and maintenance team are the first line of defense. We used to have a problem where operators would ignore small, occasional jams—writing them off as “normal” for the line. But after we started a monthly training session focused on conveyor basics, we changed that culture. We walk operators through common signs of conveyor wear: a belt that slips slightly when moving a heavy board, guide rails that feel loose when touched, or a board that leaves a small mark on the edge when it moves. We also do hands-on training, letting operators adjust guide rails or replace a belt so they understand how small changes affect performance. Last quarter, an operator noticed a slip in the conveyor belt during a routine check—she adjusted the tension before it caused a jam, saving us 2 hours of downtime. We also hold a weekly 10-minute huddle where teams share any conveyor-related issues they noticed that week, so everyone is on the same page. This kind of cultural shift doesn’t happen overnight, but it pays off in big ways: our team now reports 80% fewer unplanned conveyor-related issues than they did two years ago.
At the end of the day, optimizing a conveyor system isn’t about buying the most expensive equipment or installing the fanciest sensors. It’s about matching your setup to your specific products, tuning processes to fit your line’s unique flow, staying on top of maintenance, and empowering your team to care about the details. For SMT PCB assembly suppliers, the conveyor system is often the hidden driver of efficiency—fixing even small issues here can add up to huge gains in production, cost, and customer satisfaction. If you’re ready to take your line’s performance to the next level, we’d be happy to walk through your current setup, share more of our hands-on lessons, and help you find solutions that work for your specific needs. Reach out to our team to discuss your conveyor system challenges and start making tangible improvements that boost your bottom line.
Cable Harness References
- SMT Conveyor System Design and Optimization Guidelines, IPC Association Connecting Electronics Industries
- "Reducing Unplanned Downtime in SMT Lines Through Proactive Conveyor Maintenance", Journal of Surface Mount Technology, 2022
- Smart Manufacturing for SMT Assembly: Sensor Integration and Data Analytics, Global SMT & Packaging Magazine, 2023
- Calibration Standards for SMT Conveyors, National Institute for Standards and Technology (NIST) Semiconductor Manufacturing Program
Huaswin Electronics Technology Co., Ltd.
Address: Building A2, Hao Hai Hong Industrial Park, No.3 Yu He Road, Gong He, Sha Jing, Bao An, Shenzhen
E-mail: sales@huaswin.com
WebSite: https://www.huaswin-pcba.com/
